 I’ve been baking cut out cookies with my kids and grandkids for 32 years. It’s one of my favorite things to do!
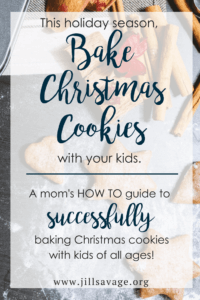
Several years ago I created a suggested plan for baking cutout cookies with kids of ALL ages. That’s what I’m sharing with you today!
Through many disappointments and trials and errors, I’ve finally learned how to do it well at every stage of mothering and grandmothering.
Let me share my secrets with you!
Here’s the recipe I’ve used in the past:
Cut-Out Cookies
1/2 c. Crisco
1 stick butter
1 c. sugar
3 eggs
2 tsp baking powder
1-1/2 tsp vanilla
3-1/2 c. of flour (I usually add more until the dough isn’t sticky)
Chill 1 hour. Roll 1/4″ thick with rolling pin. (I disinfect my kitchen island and roll the dough right on the counter top. Make sure and flour the surface you are rolling on and flour the rolling pin–just rub flour all over it–so the dough doesn’t stick)
Use cookie cutters for shapes. Bake 400 degrees for 6-8 minutes until shine is off (do not overcook–you don’t want them brown on the edges).
Here’s the recipe GLUTEN FREE/DAIRY FREE Cut-Out Cookies Recipe (one we use more often now)
3 cups Bob’s Red Mill Gluten Free 1-to-1 Baking Flour
2 teaspoons baking powder
1 cup unbleached pure cane sugar
2 sticks (1 cup) salted butter, chilled (we use Earth Balance Buttery Sticks to make them dairy free)
1 large egg
1-1/2 tsp vanilla extract
2 tbsp whole milk (we use almond milk)
Combine butter and sugar with a mixer until it’s light and fluffy, add in milk, egg, and vanilla. Mix flour and baking powder in separate bowl, then slowly add to butter mixture until crumbly. Form dough ball with your hands and then roll and cut out. Bake 10-12 minutes at 350 degrees. Enjoy!
Thank you Natural Chow for this great recipe! It’s so yummy and you’d never know it’s gluten free (and in our case, dairy free!)
Icing
2 sticks butter (softened–I leave the sticks on the counter for about 30 min)
4-1/2 – 4-3/4 c. powdered sugar (I usually add more until it peaks when you mix it)
1/2 c. milk (or almond milk)
1-1/2 tsp vanilla or peppermint (we use peppermint!)
Beat butter to fluffy and add 1/2 of the powdered sugar. Add milk and vanilla and rest of sugar. Divide into smaller bowls and add food coloring as desired (we usually do red, green, blue, yellow, and white)
Note: Cookies can be frozen either before icing or after icing, if you want to decorate or eat at a later time.
Here’s how to successfully make cut-out cookies with kids of any age:
Preschool Years:
1) Day 1: You make and chill dough while they are napping.
2) Day 2: You cut out and bake cookies while they are napping.
3) Day 2 or 3: You make icing and ice the cookies
4) Your preschooler can put sprinkles on while the icing is still wet.
5) Enjoy eating, giving away, and sharing the yummy cookies you made!
Grade School Years
1) You make and chill the dough
2) You roll out the dough and let them use the cookie cutters to cut out the shapes
3) You put them in the oven.
4) Once all the cookies are cool, the kids and you can ice them and decorate with sprinkles. (this can also be done on the next day if cookies are stored in an airtight container.)
5) Enjoy!
Note: Grade school years is a great time to teach your kids to make cookies from scratch. Since Christmas cookies have five parts to them–1) making the recipe 2) chilling the dough 3) rolling the dough and cutting the cookies 4) baking the cookies 5) decorating the cookies—I find this isn’t the best time to teach them to bake. The process is too long and they are impatient to get to the cutting out and decorating. Teach them to follow a recipe some other time with something like Chocolate Chip cookies or Oatmeal Raisin Cookies that you just mix up, bake, and eat!
 Junior High/High School Years
1) You make and chill the dough (if you have a teen that wants to do that, let them!)
2) You show them how to roll out the dough and cut out the cookies, then let them do it themselves!
3) You help with the baking.
4) Enjoy decorating the cookies with your family!
Even when the dough is already made and chilled, it’s usually about a 3 hour process to roll out the dough, cut out the cookies, bake, and decorate them. That’s why I’m a believer in already having the dough made and chilled no matter the age of the kids!
If you’re here for the first time, I write about faith, family, motherhood, and marriage. If you don’t want to miss out on future giveaways and words of encouragement, you can subscribe below!


Thank you for your blessings of wisdom. <3
Thanks for hanging with me online!
This was the recipe of my childhood. We made these every year as a child, and now I make them with my children. This recipe has been in constant use for over 40 years. I’m going to whip up a double batch of dough today! I gave the recipe to a friend last week, and she said they came out perfect.
Grandma Dorothy’s Roll-Out Cookies
2 sticks butter, softened
1- 1/2 c. sugar
2 eggs
2 tsp vanilla
1 tsp baking powder
1/2 tsp salt
3-3/4 c. of flour
Sift flour, baking powder and salt in a bowl and set aside. Beat butter, sugar, eggs, and vanilla in a bowl until light and fluffy. Add the sifted ingredients.
Chill 1-2 hours. Roll 1/4″ thick with rolling pin on a floured surface. I usually do this using 1/4 of the dough at a time, leaving the rest in the fridge.
Use floured cookie cutters for shapes. Bake 400 degrees for 6-8 minutes on greased cookie sheets until shine is off (do not overcook–you don’t want them brown on the edges). Let cool 5 minutes, then transfer carefully to wire racks with spatula.
When cool, decorate with powdered sugar icing (1 cup powdered sugar with a couple tablespoons milk of choice to make a slightly runny consistency and food coloring. We make about 5 bowls of different colors. ) Add sprinkles of choice while the icing is still wet, then let dry. Can be stacked once completely dried (about 8 hours or overnight).
Looks yummy!